English
 عربى
عربى Español
 Français
Household Mould Guide: How to Choose, Maintain and Source the Right One for Your Home Products
Discover practical insights on selecting, caring for, and obtaining the right equipment for shaping plastic home products. This piece shares field observations on materials, upkeep, design choices, suitable varieties, and sourcing options that match everyday manufacturing needs.
You might be handling plastic parts for items found around the house and asking yourself how to settle on equipment that keeps things running smoothly. These tools shape everyday objects like containers, utensils, and storage pieces by letting material flow in, cool down, and come out clean. From our side as a manufacturer, we notice that paying attention to the details here really affects how steady the output stays and what the finished pieces end up looking like.
The sections ahead pull together six areas that come up often in conversations with clients. They walk through picking the right option for specific home items, the substances that go into making the equipment, ways to keep everything in working order, the role of early planning, matching the style to different products, and finding a supplier when something made-to-order is on the table. Stick with it and you will see how each piece fits together in day-to-day work.
How to Choose Household Mould for Home Products
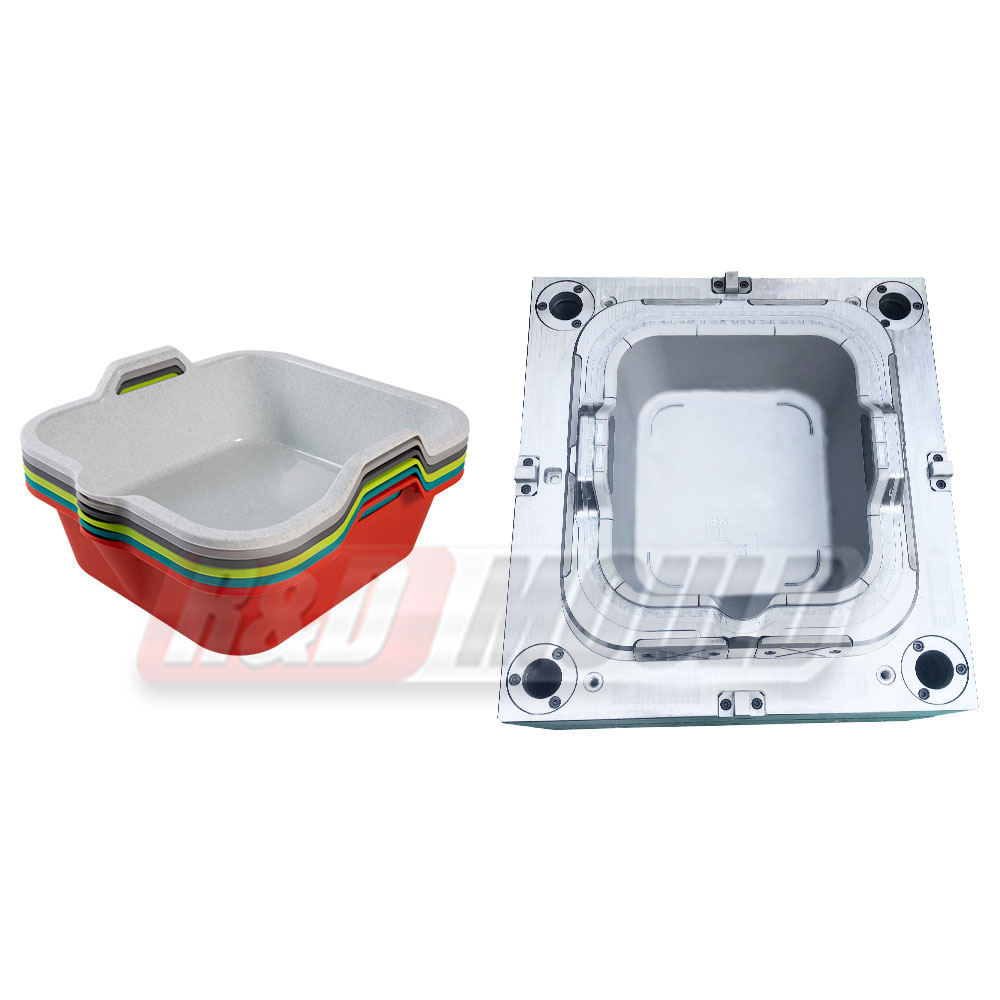
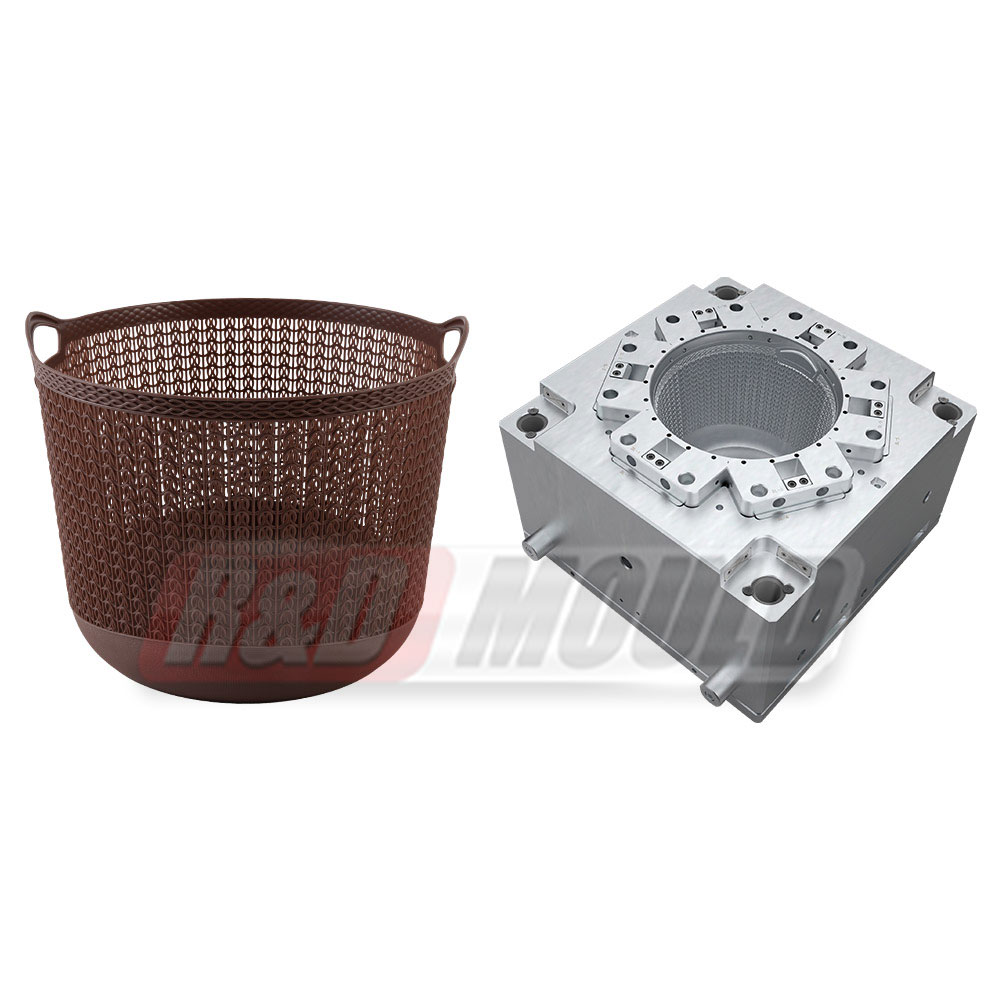
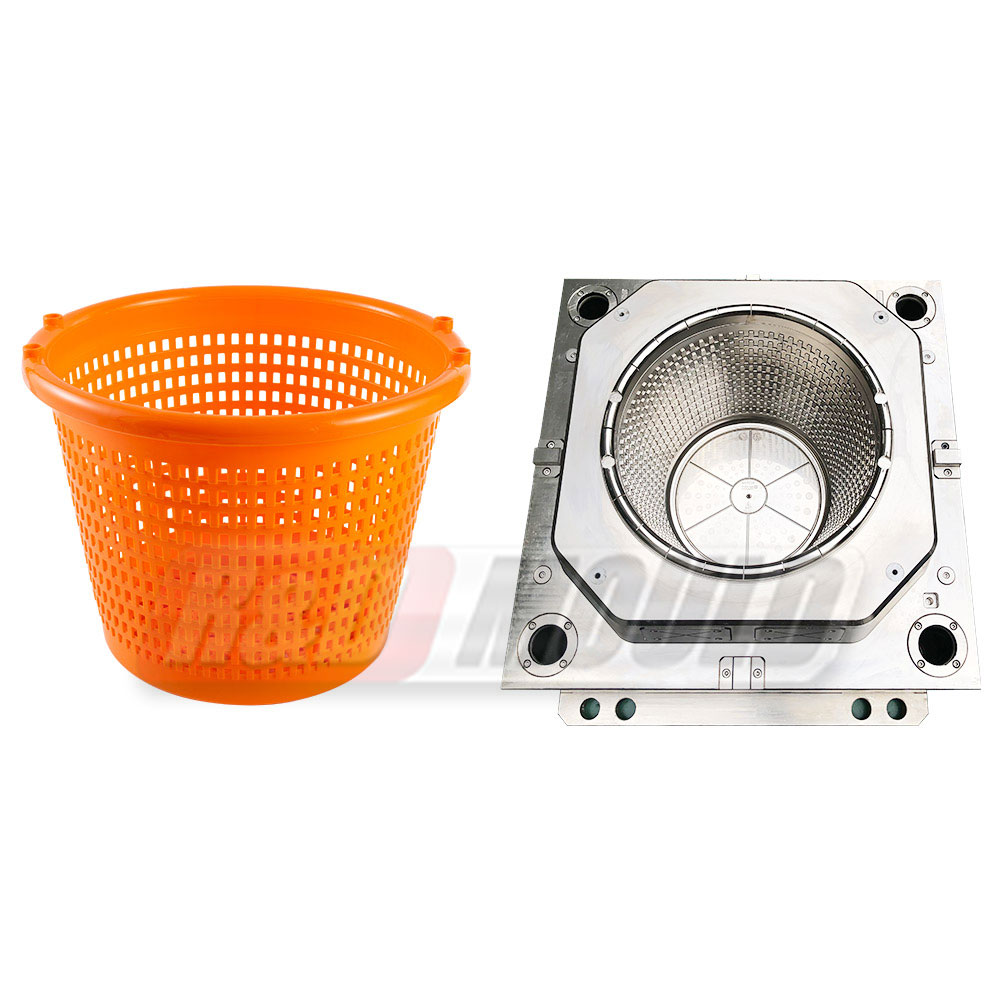
Picking the right equipment begins with a close look at the item you want to produce. Think about its overall size and form, since those elements decide the space inside the cavity and the path the material takes while filling it. Pieces that have slim walls or fine surface patterns call for setups that fill evenly and avoid gaps or spots that end up too thick or too thin.
Production numbers matter next. Equipment built for shorter runs can stay fairly straightforward in construction, whereas setups meant for ongoing cycles often include details that cope with repeated heating and cooling cycles. The look you want on the outside also steers the decision—smooth finishes need cavities that have been polished, while textured surfaces pair with matching cavity textures.
A short checklist helps keep the process organized. Start by noting the main features of the finished piece, including dimensions and any spots where the shape pulls inward or adds threads. Then list the material that will go in, because plastics behave in their own ways during the filling stage. Consider the speed you expect for each cycle, since quicker output may need channels that pull heat away efficiently. Finally, think about any steps that happen after the piece comes out, as some layouts make it simpler to add other components later.
You see these choices play out in real situations. Storage pieces, for example, need features that let them stack neatly and lids that fit snugly, so the equipment focuses on holding close measurements where surfaces meet. Kitchen tools might emphasize comfortable grips and areas that stand up to warmth, which leads to layouts with several cavities spaced for even flow. Spending time here at the start cuts down on later fixes and helps the whole line move along without hitches.
We often receive drawings or sample parts from clients at this point. That early exchange brings useful comments on what works and what might need tweaking, so everything lines up with the way the item will actually be used. In our experience, clear back-and-forth at this stage makes the rest of the project feel more straightforward.
What Materials Are Used in Household Mould Production
The equipment comes together using substances picked for their ability to handle pressure, shifts in temperature, and repeated cycles. Steel shows up regularly because it strikes a balance between strength and the ease of shaping it in the workshop. Some kinds of steel machine cleanly when the form is cut, while others hold up better once the actual runs begin.
Several properties guide the choice. Hardness determines how well the surface keeps its shape after many cycles, particularly in the areas that touch the plastic directly. How well the material moves heat away from the cavity influences cooling speed and the evenness of the finished part. Resistance to corrosion becomes important when moisture or certain additives from the plastic are present during operation.
In workshops, teams weigh the differences between available options. Some steels cut more quickly in the beginning stages, which can shorten the time before the samples appear. Others keep their surface quality longer, so polishing sessions happen less often. The final call usually depends on the plastic being used and how many cycles the job will run. For moderate volumes of home items, a material that offers reasonable cost along with dependable service tends to get chosen.
A quick comparison table can clarify the usual considerations:
- Options that machine easily often speed up the early shaping stage, which fits when small changes to the layout are still likely.
- Options that resist wear help stretch the time between service stops, especially when the plastic contains particles that rub against the surface.
- Options that move heat well can shorten each cycle by letting the material cool faster, which matters when the line needs to keep pace.
Aluminum sometimes appears for trial runs or lower-volume work because it cuts quickly and spreads heat evenly. Still, steel remains the main choice for jobs that stretch across many months. The decision also takes the overall size of the equipment and the forces at work during each cycle into account.
Knowing these traits lets buyers ask sharper questions when they sit down with a supplier. The talk stays centered on how the substance will behave in the actual setting where home products come together.
Tips for Maintaining Household Mould Properly
Keeping the equipment in good shape helps it last longer and supports steady output. A routine built around cleaning, lubrication, and checks stops minor issues from turning into bigger problems down the line.
Cleaning comes , usually right after a run or at set intervals. Wipe away any leftover material from the cavity surfaces with suitable cleaners that do not scratch the finish. Focus on the small vents and the lines that carry cooling water, because buildup there can change part quality or slow things down.
Lubrication follows. Put a thin layer of approved release agents or lubricants on moving sections such as slides, ejectors, and guide pins. Stick to products that match the material of the equipment so no unwanted reactions create pits or deposits.
Inspections should happen on a schedule. Look over high-contact zones for wear, check water lines for leaks or scale, and make sure all fasteners stay tight. Writing down these observations builds a log that helps forecast when certain parts may need attention.
Storage also plays a part. When the equipment sits idle, place it in an area with steady temperature and humidity levels. A light protective layer on exposed metal surfaces limits oxidation. Cover the whole unit to keep dust out, and rest it on supports that spread its weight evenly.
Two mistakes come up more than others. One is skipping the clean between different plastics, which risks mixing residues. The other is tightening components too firmly during reassembly, which can throw alignment off. Steering clear of those habits keeps performance reliable.
For deeper care, plan occasional take-apart of accessible sections. That gives room for thorough cleaning and swapping seals or rings before they wear out. Training the people who run the machines on these steps builds a common sense of how small daily actions affect the bigger picture.
Following routines like these helps the equipment keep turning out consistent home items without sudden stops.
Why Household Mould Design Matters in Product Manufacturing
Early choices in the layout of the equipment play a big part in how smoothly the manufacturing line moves and how the final pieces hold up. The way cavities sit, where the entry points for material go, and how cooling paths wind through the structure all affect how the plastic flows and how cleanly the part releases.
Cooling paths receive special attention. When channels spread heat removal evenly, the material sets at a similar pace across the piece, which cuts down on built-in stresses and keeps dimensions steady. Channels that sit in the wrong spots can leave warmer areas that cause slight bends or depressions on visible faces.
The spot and style of the entry gate influence both the fill and the look of the part. A well-placed gate lets material spread without leaving obvious marks or weak zones. Its size also decides how much pressure builds and how neatly the piece separates once cooled.
Vents need careful placement too. They let air slip out as the plastic advances. Without enough of them, air pockets can scorch the surface or leave sections unfilled, especially in the thin or detailed areas common in home products.
Ejection needs planning as well. Pins or sleeves kept away from important surfaces help the piece come free without marks or bends. The timing and strength of that push must match the shape so nothing sticks or stretches out of line.
The overall frame of the equipment matters. Pillars and plates spread clamping pressure evenly, which keeps everything aligned through each cycle. Removable inserts in the core and cavity make it simpler to swap worn sections without starting from scratch.
When the layout takes these points into account, runs face fewer pauses and the home items come out more uniform. Teams usually sit down with the maker to review plans and confirm that features match the way the product will be used.
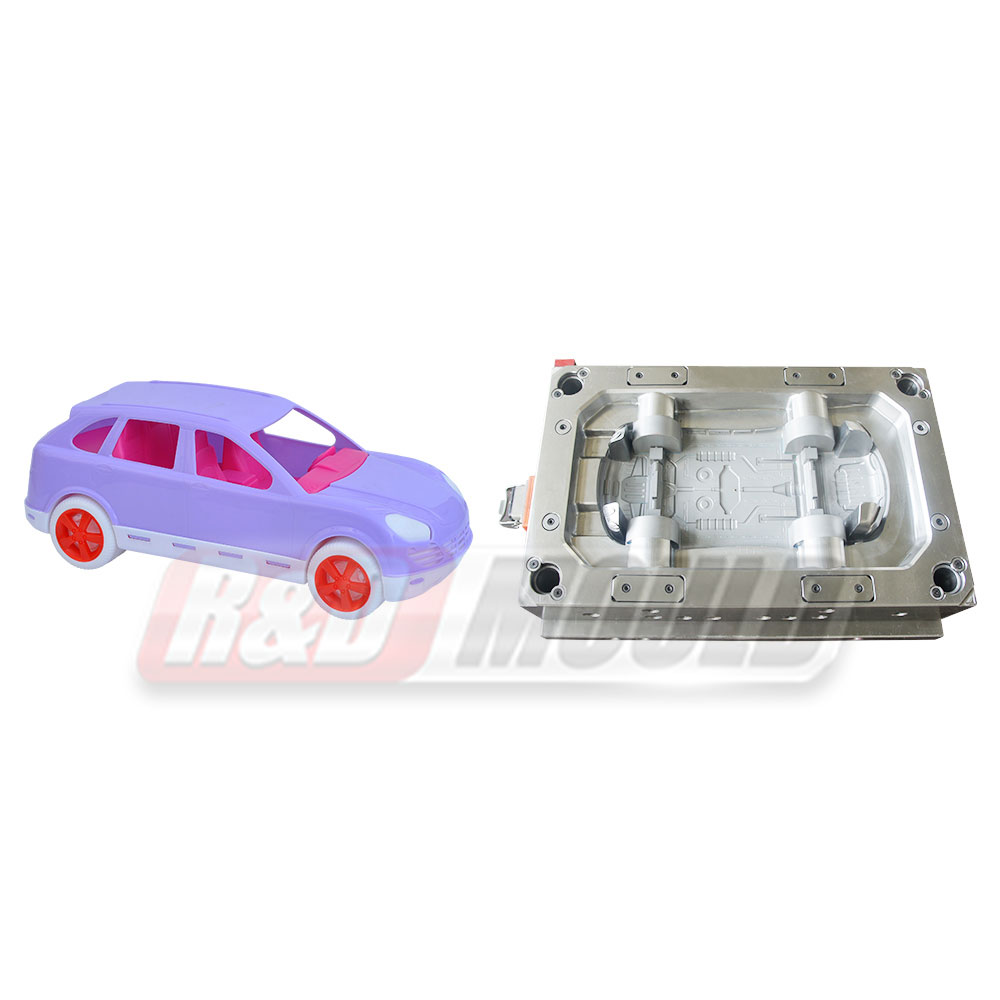
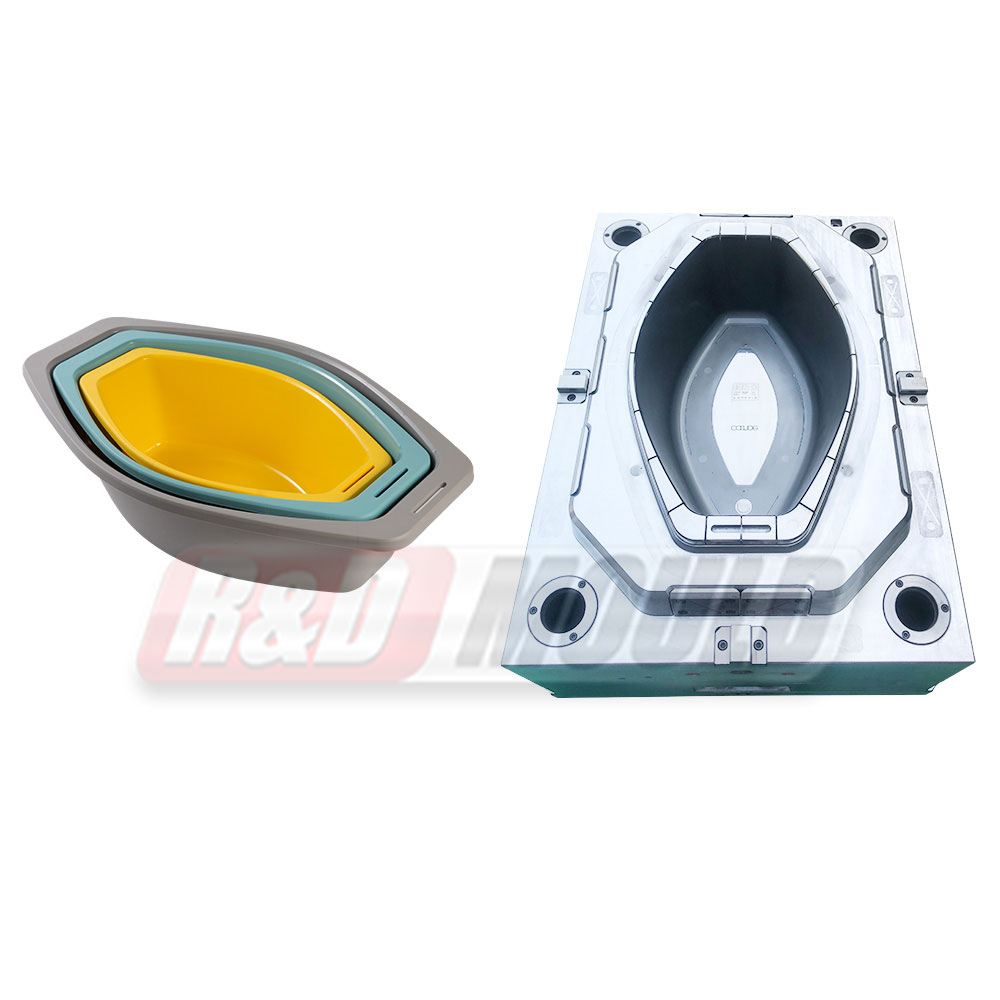
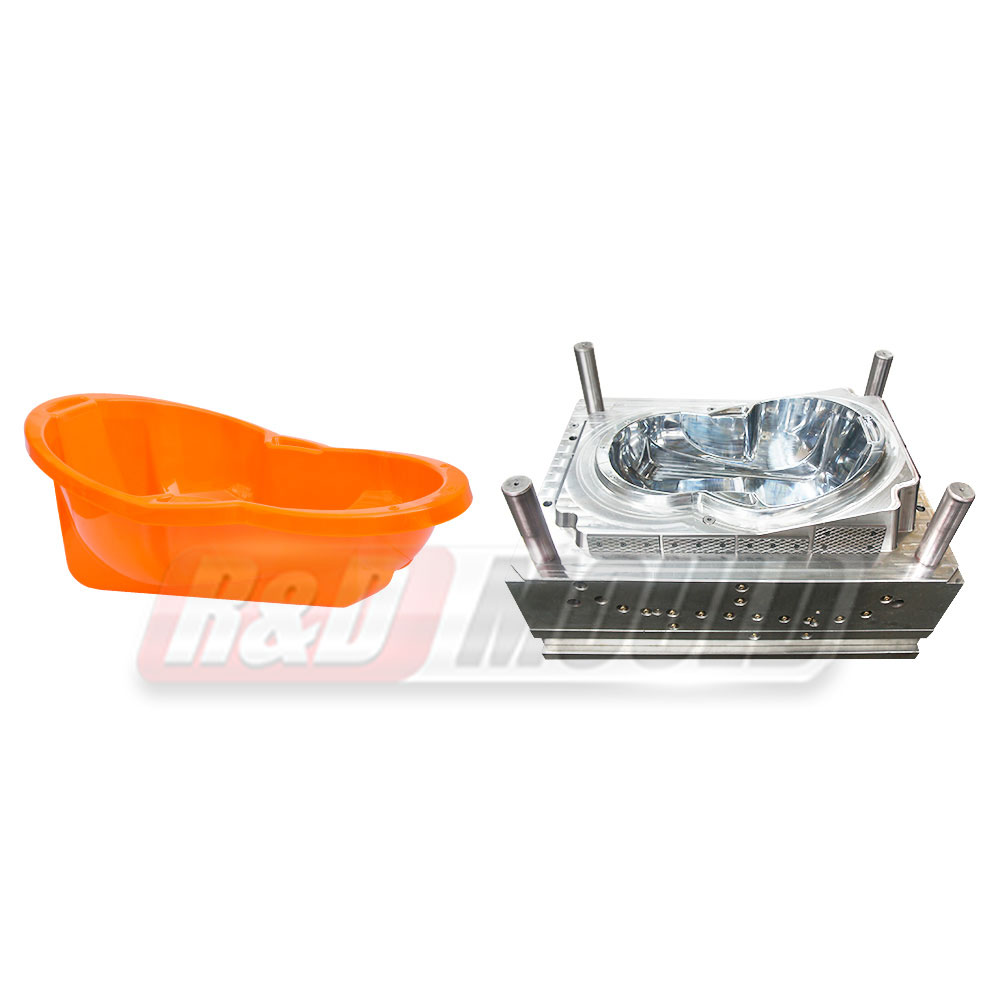
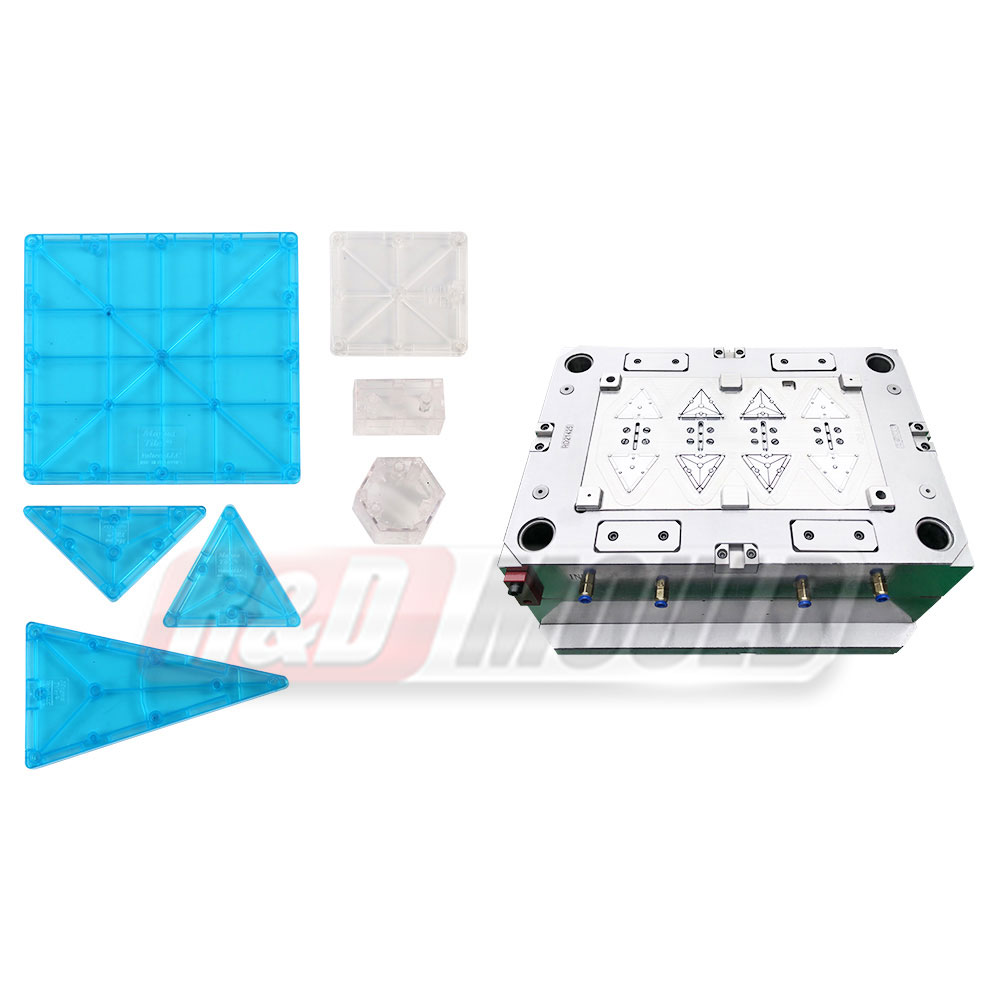
Which Household Mould Type Is Appropriate for Different Household Items
Equipment comes in a few main styles, each matched to certain forming methods and product shapes. Injection styles push material into a closed space under pressure. They suit items that need sharp details and close measurements, such as lids, handles, or small fittings.
Blow styles inflate a tube of plastic inside the cavity to form hollow shapes. They often fit containers that require open space inside and walls of even thickness, like bottles or larger bins.
Compression styles press material between two halves. This approach works for thicker pieces or materials that do not flow as freely. It shows up in some home applications where the final form benefits from steady pressure during shaping.
Matching the style to the job starts with the product shape and the forming process. Items that have inward curves or threads may need extra moving parts in the equipment, no matter the base style. Pieces that stack or fit inside each other do well with slight angles that ease release.
A simple matching guide can help:
- Items with detailed surfaces or several features often line up with injection styles because of the control over where material goes.
- Hollow or lighter containers pair well with blow styles since the inflation step creates uniform walls.
- Thicker or plainer shapes may suit compression styles when the material works better under direct pressure.
The surroundings where the item will live also guide the choice. Home products that face warmth or dampness may need styles that support materials built for those conditions. Expected volume plays a role too, since some styles grow more easily when output rises.
Looking at these elements lets teams settle on the style that fits the item without adding steps that are not needed.
Where to Source Household Mould for Custom Production Needs
Finding the right supplier means weighing channels that can deliver the needed quality and stay within the planned schedule. Reaching out directly to makers often opens the door to on-site design and machining, which can make updates simpler and keep everyone on the same page.
Some suppliers stock standard bases or parts, which can help when the job includes many ready-made elements. Full custom work, though, usually moves faster through a shop set up to handle the entire flow from layout to trial runs.
When weighing options, look at delivery times, how easy it is to talk, and the help offered after the equipment arrives. Certain sources focus on particular sizes or substances, so matching their background to the project size avoids hold-ups.
A few steps make the search clearer. Prepare a request that spells out the drawings, material needs, and planned volume. Ask about trial procedures and sample runs to see how things perform before full commitment. Inquiring about upkeep advice early on also supports longer service.
For made-to-order work, choose providers who talk openly about layout reviews and substance choices. That conversation confirms the equipment will line up with the requirements of the home items involved.
Many shops keep the ability to build new units or adjust existing ones, which gives room to adapt when needs shift over time.
Equipment for shaping plastic home products sits at the center of many production lines. The areas covered here—selection, materials, upkeep, planning, matching styles, and sourcing—link together to create a full view of how these tools support manufacturing aims. Care taken in each step adds to steady output and even quality in the parts.
Whether the plan involves a fresh line or an update to current work, stepping through these points offers a clear path forward. The details here give a base for talks with suppliers and help match decisions to real workshop needs.
Ready to talk through an option that fits your production setup? Reach out to the team for a conversation about your requirements and the next moves.